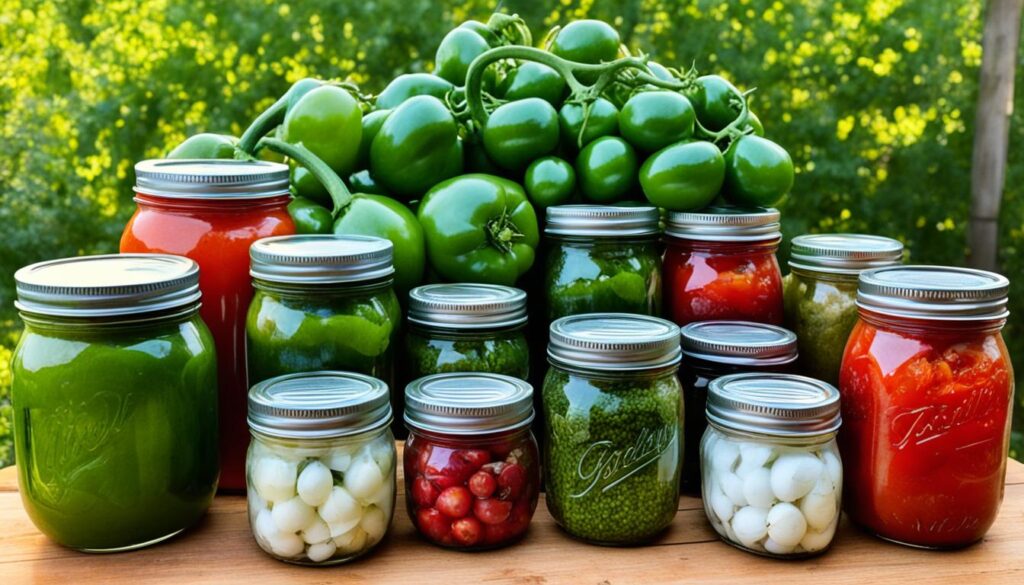
Canning salsa is a fantastic way to preserve the vibrant flavors of homemade salsa so that you can enjoy it all year long. Whether you have an abundance of tomatoes from your garden or want to make use of fresh ingredients, the canning process allows you to safely store and savor salsa whenever you desire. In this step-by-step guide, we will walk you through the best canning practices and safe salsa canning methods, ensuring that you can easily preserve the freshness of your favorite salsa recipes.
Key Takeaways:
- Learn how to can salsa to enjoy the flavors of homemade salsa year-round.
- Preserving salsa involves selecting the right ingredients and following the proper canning process.
- Having the essential supplies like the Ball® Home Preserving Starter Kit and a canner is crucial for successful salsa canning.
- Prepare the salsa by gathering the necessary ingredients and removing the tomato skins for a smooth texture.
- Follow the step-by-step canning process, including filling jars, removing air bubbles, sealing correctly, and processing.
Why Can Salsa?
Canning salsa offers several benefits and advantages. Here are some compelling reasons to embrace this preservation method:
- Utilize an abundance of tomatoes: Canning salsa allows you to make use of an abundance of tomatoes from your garden or local farmers market. It’s a smart way to prevent wastage and enjoy the flavors of fresh, ripe tomatoes throughout the year.
- Convenient pantry staple: Once canned, salsa becomes a convenient pantry staple that can be used in various recipes. It adds a burst of flavor to dishes such as tacos, burritos, quesadillas, and more. You can also enjoy it as a classic dip with tortilla chips.
- Extended freshness and flavors: Canning salsa helps preserve its freshness and flavors for an extended period. The canning process locks in the vibrant taste of homemade salsa, so you can savor the deliciousness long after the growing season has ended.
By canning salsa, you not only reduce food waste but also ensure that you have a versatile and flavorful ingredient readily available whenever you need it. Let’s dive into the essential supplies and process of canning salsa.
Now, let’s take a closer look at the essential supplies you’ll need for canning salsa in the next section.
Essential Supplies for Canning Salsa
To can salsa, you will need a few essential supplies. The right canning equipment ensures a successful and safe salsa canning process. Here are the necessary supplies for salsa canning:
Canning Supplies
Here is a list of essential canning supplies for successful salsa canning:
- Ball® Home Preserving Starter Kit
- 16-ounce canning jars
- Preserving rack
- Basic preserving utensils
- Home preserving guide
- Recipe booklet
The Ball® Home Preserving Starter Kit is an excellent choice for beginners as it provides all the necessary tools and resources to get started with canning salsa. It includes everything from jars to utensils, making it convenient and efficient for preserving your homemade salsa.
Canner
In addition to the starter kit, you will also need a canner to safely process the salsa jars. A large stock pot can serve as a canner, as it can hold water and jars during the canning process. Ensure the pot is deep enough to fully submerge the jars and has a secure lid for proper sealing. Having a suitable canner is essential for maintaining the necessary temperature and pressure while canning salsa.
By having these essential supplies on hand, you can confidently proceed with the salsa canning process, knowing that you have all the necessary tools to prepare and preserve your delicious homemade salsa.
Without additional width=, align=, style=, or other auxiliary attributes.
| Essential Canning Supplies | Description |
|---|---|
| Ball® Home Preserving Starter Kit | A comprehensive kit that includes preserving tools, jars, and resources for canning salsa |
| 16-ounce canning jars | Specific jars designed for canning and preserving salsa |
| Preserving rack | A rack that holds the jars in place during the canning process |
| Basic preserving utensils | Utensils like a jar lifter, funnel, and bubble remover for proper canning procedures |
| Home preserving guide | A comprehensive guide that provides step-by-step instructions for canning salsa |
| Recipe booklet | A booklet containing salsa and canning recipes for reference and inspiration |
Without additional width=, align=, style=, or other auxiliary attributes.
Preparing the Salsa for Canning
Before you can begin the canning process, it’s important to prepare the salsa properly. Gathering all the necessary ingredients is the first step in creating a delicious homemade salsa to be canned. For a classic salsa recipe, you’ll need fresh tomatoes, onions, peppers, garlic, vinegar, lime juice, cilantro, and salt.
To ensure a smooth texture in your salsa, it’s recommended to peel the tomatoes before making the salsa. There are two common methods for peeling tomatoes: blanching or roasting. Blanching involves briefly immersing the tomatoes in boiling water, then transferring them to an ice bath. The heat from the boiling water loosens the skin, making it easy to peel. Alternatively, you can roast the tomatoes in the oven until the skins blister and darken slightly. The roasted tomatoes not only peel easily but also develop a delicious caramelized flavor.
| Tomato peeling methods: | |
|---|---|
| Blanching: | Immerse the tomatoes in boiling water for about 30 seconds, then transfer them to an ice bath. The skins will easily peel off. |
| Roasting: | Cut the tomatoes in half, place them cut-side down on a baking sheet lined with parchment paper, and roast in a preheated oven at 400°F (200°C) for about 20 minutes or until the skins blister and darken. Let the tomatoes cool before peeling off the skins. |
Once the tomatoes are peeled, you can proceed with the salsa-making process. The peeled tomatoes, along with the rest of the ingredients, will come together to create a flavorful salsa that can be preserved through canning.
Expert Tip:
For a smoky twist, consider adding roasted peppers to your salsa. Simply char the peppers directly over a gas flame or under a broiler until the skins are blackened. Place the charred peppers in a bowl covered with plastic wrap to steam, then remove the skin and seeds before adding them to your salsa.
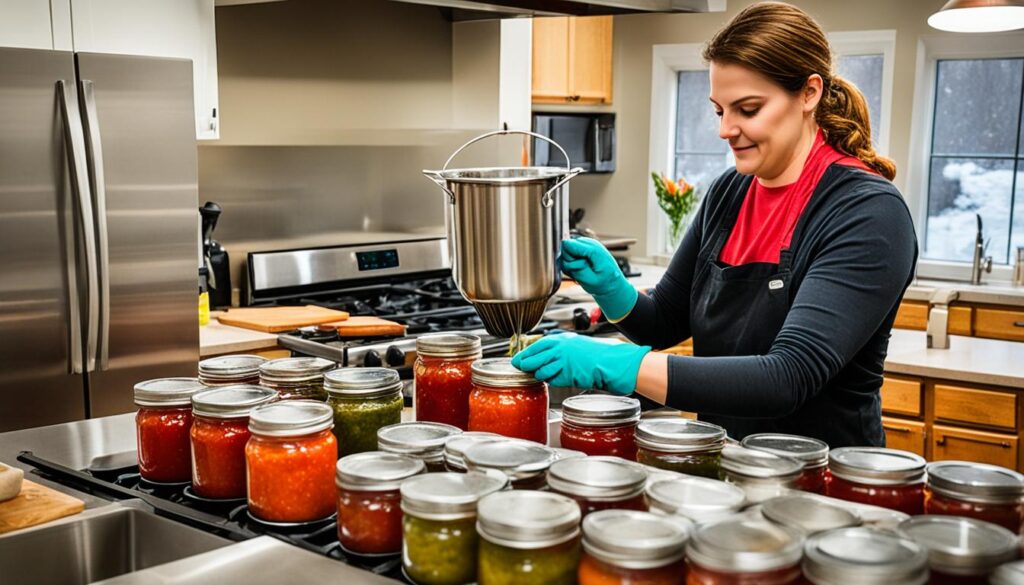
The Canning Process
The canning process involves several important steps that ensure the safe and effective preservation of your homemade salsa. Follow this step-by-step guide to successfully can your salsa and enjoy its flavors all year round.
Step 1: Preparing the Jars
Before filling the jars with salsa, it’s essential to preheat them in simmering water. This step prevents the jars from breaking when filled with hot salsa. Submerge the jars in simmering water for a few minutes before carefully removing them.
Step 2: Filling the Jars
Now it’s time to fill the heated jars with your freshly made salsa. Leave about a ½-inch headspace at the top of each jar to allow for expansion during processing and sealing. Fill the jar, being careful not to overfill.
Step 3: Removing Air Bubbles
Before sealing the jars, it’s important to remove any air bubbles that may be trapped in the salsa. To do this, gently tap the jars on a countertop to release the bubbles. You can also use a non-metallic utensil, such as a chopstick or plastic spatula, to stir and remove air pockets.
Step 4: Proper Sealing
After removing air bubbles, wipe the rim of each jar clean with a clean, damp cloth or paper towel. Place a lid on top of each jar and secure it with a band, ensuring it is tight but not overly tightened. This allows air to escape during processing while maintaining a proper seal.
Step 5: Processing Time
Place the filled and sealed jars in a canner filled with water. Make sure the jars are completely submerged with at least one inch of water above the jar lids. Bring the water to a boil and process the jars for a specific time based on your altitude. Refer to the canning resources for the recommended processing time.
Step 6: Cooling and Storing
Once the jars have been processed, carefully remove them from the canner using jar tongs or a jar lifter. Place the jars on a heat-resistant surface and let them cool undisturbed for 12 to 24 hours. As the jars cool, you may hear a popping sound, indicating that the lids have properly sealed.
After the cooling period, check the seals of the jars by pressing down on the center of the lid. If the lid does not flex or pop, the seal is secure. Store the cooled and sealed jars in a cool, dark location, such as a pantry or basement, to maximize shelf life.
By following these steps, you can confidently can your homemade salsa and enjoy its flavors whenever you desire. The proper canning process ensures that your salsa is safely preserved and ready to be enjoyed in dips, sauces, or as a flavorful topping for your favorite dishes.
Recommended Processing Times
| Altitude | Processing Time |
|---|---|
| 0-1,000 feet | 15 minutes |
| 1,001-3,000 feet | 20 minutes |
| 3,001-6,000 feet | 25 minutes |
| Above 6,000 feet | 30 minutes |
Canning Salsa Variations
While traditional salsa includes tomatoes, onions, peppers, garlic, and lime juice, you can get creative and add different ingredients to customize your salsa. Experimenting with salsa variations allows you to create unique flavor profiles and cater to your personal taste preferences. Here are some popular salsa variations to inspire your culinary creativity:
Fruit Salsas
Adding fruits like mango or pineapple to your salsa can bring a delightful sweetness and tanginess to the mix. The vibrant tropical flavors of these fruits complement the savory ingredients and create a refreshing twist. Consider experimenting with different fruit combinations to find the perfect balance for your taste buds.
Spicy Salsas
If you’re a fan of bold and fiery flavors, adding spices like cumin or chipotle can take your salsa to the next level. These spices infuse the salsa with smokiness and a bit of heat, creating a tantalizing experience for spice enthusiasts. Adjust the spice level according to your preference and enjoy the robust flavors.
Herb-infused Salsas
Herbs can add a burst of freshness and aromatic complexity to your salsa. Experiment with adding fresh herbs like cilantro, basil, or mint to enhance the flavor profile of your salsa. The herbal notes will elevate the overall taste and provide a delightful sensory experience.
Vegetable Medley Salsas
Expand your salsa repertoire by incorporating a variety of vegetables. Consider adding ingredients such as corn, black beans, or bell peppers to create a colorful and texturally diverse salsa. This vegetable medley will not only add depth to the flavors but also make your salsa even more visually appealing.
Remember, the key to successful variation experimentation is to strike a balance between flavors and textures. Start with small portions of the new ingredients and adjust quantities to achieve the desired taste. Don’t be afraid to get creative and customize the salsa to your liking. Whether you prefer a fruity, spicy, herb-infused, or vegetable medley salsa, the possibilities for delicious combinations are endless.
| Salsa Variation | Ingredients |
|---|---|
| Fruit Salsa | Tomatoes, onions, peppers, garlic, lime juice, mango or pineapple |
| Spicy Salsa | Tomatoes, onions, peppers, garlic, lime juice, cumin or chipotle |
| Herb-infused Salsa | Tomatoes, onions, peppers, garlic, lime juice, fresh herbs (cilantro, basil, mint) |
| Vegetable Medley Salsa | Tomatoes, onions, peppers, garlic, lime juice, corn, black beans, bell peppers |
Conclusion
In conclusion, canning salsa is a fantastic way to preserve the vibrant flavors of homemade salsa and enjoy it throughout the year. By following the step-by-step guide and using the right supplies and techniques, you can safely store your salsa and have it readily available whenever you crave a tangy and spicy treat. Whether you prefer a classic salsa recipe or enjoy experimenting with different variations, canning salsa allows you to savor the freshness of seasonal ingredients no matter the season.
With the right tools and a little effort, you can stock your pantry with jars of delicious homemade salsa that will impress your family and friends. Imagine the satisfaction of opening a jar of your own creation, knowing that you have preserved the flavors of summer and have a taste of sunshine on even the dreariest winter day. So gather your supplies, roll up your sleeves, and embark on the wonderful journey of canning salsa. It’s not only a practical and convenient way to enjoy salsa, but it’s also a labor of love that brings joy to your kitchen and your taste buds.
So embrace the world of canning salsa, and discover the endless possibilities of flavor combinations waiting to be explored. Preserve the essence of ripe tomatoes, onions, peppers, and spices, and indulge in the satisfaction of knowing that you have mastered the art of canning salsa. Start your salsa-making adventure today and unlock a world of vibrant and delectable flavors that you can savor anytime, anywhere. Happy canning!
FAQ
What are the benefits of canning salsa?
Canning salsa allows you to preserve the vibrant flavors of homemade salsa so that you can enjoy it year-round. It also helps to make use of excess tomatoes and provides a convenient pantry staple that can be used in various recipes or enjoyed as a dip with tortilla chips.
What supplies do I need to can salsa?
To can salsa, you will need essential supplies such as jars, a canner, basic preserving utensils, and a home preserving guide. The Ball® Home Preserving Starter Kit is a great option for beginners as it includes all the necessary tools and equipment.
How do I prepare the salsa for canning?
Before canning salsa, gather all the necessary ingredients and peel the tomatoes using either the blanching method or roasting them in the oven. This will help to remove the tomato skins easily and enhance their flavor.
What is the canning process for salsa?
The canning process involves preheating the jars, preparing the salsa recipe, filling the jars with hot salsa, removing air bubbles, sealing the jars, boiling them for a specific processing time, and allowing them to cool and sit undisturbed before storing.
Can I customize my salsa recipe?
Yes, you can get creative and customize your salsa recipe by adding different ingredients like fruits or spices to suit your taste preferences.
Why should I can salsa?
Canning salsa allows you to enjoy the flavors of homemade salsa year-round and helps to preserve the freshness and flavors of the salsa for an extended period.
What are the best practices for safe salsa canning?
To ensure safe salsa canning, it is important to follow proper canning techniques, use tested recipes, maintain proper sanitation, and correctly process and store the jars of salsa.