Welcome to our easy French bread recipe! If you’ve always wanted to make homemade French bread but thought it would be too complicated, this recipe is perfect for you. Even as a beginner, you’ll be able to achieve a light and fluffy loaf of French bread that rivals any bakery.
What makes this recipe so easy is that you can make the dough either in a stand mixer or by hand. You’ll judge the amount of flour by the look and feel of the dough rather than relying on an exact measurement. This flexibility allows you to customize the recipe based on your preferences and the tools you have available in your kitchen.
Are you ready to learn how to make your very own French bread? Let’s get started!
Key Takeaways:
- Our easy French bread recipe is perfect for beginners.
- You can make the dough in a stand mixer or by hand.
- Judge the amount of flour by the look and feel of the dough.
- Customize the shaping of the loaves to your preference.
- Scoring the dough before baking helps with rising and prevents cracking.
Ingredients and Mixing the Dough
One of the key elements in making delicious French bread is using the right ingredients and properly mixing the dough. Let’s take a closer look at the ingredients and the mixing process for this recipe.
Ingredients
Here are the ingredients you’ll need:
- Warm water
- Yeast
- Sugar
- Salt
- Oil
- Flour
These simple ingredients come together to create the perfect texture and flavor of French bread.
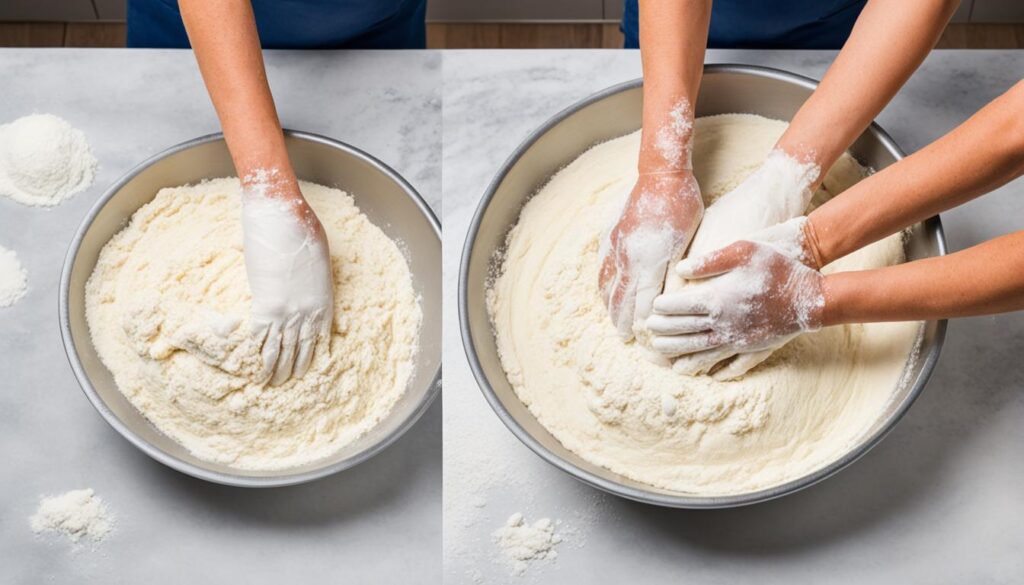
Mixing the Dough
Now, let’s dive into the process of mixing the dough:
- Dissolve the yeast in warm water with sugar. This helps activate the yeast and promotes proper fermentation.
- In a stand mixer with a dough hook attachment or by hand, combine the basic dry ingredients – salt, oil, and flour.
- Gradually add the water and yeast mixture to the dry ingredients while mixing. This allows the dough to come together smoothly.
- Knead the dough until it becomes smooth and elastic. The mixing time may vary depending on the mixer and the feel of the dough.
Remember to pay attention to the texture of the dough as you mix it. The goal is to achieve a smooth, elastic consistency.
By following these steps and using the right ingredients, you’ll be well on your way to creating a delicious French bread dough. The next section will cover the rising and shaping of the loaves.
Rising and Shaping the Loaves
Once the dough is mixed, it’s time to let it rise and take shape. A crucial step in the French bread-making process, rising allows the dough to develop flavor and texture. This section explores two methods for rising the dough and provides a step-by-step guide on how to shape the loaves for that classic French bread appearance.
The Rising Process
After the dough is mixed, it needs time to rise until it has doubled in size. This process allows the gluten to develop, resulting in a light and airy loaf of French bread.
There are two methods you can use for rising the dough:
- Resting and Stirring Down: With this method, you let the dough rest for 10 minutes, then gently stir it down. Repeat this process for about an hour or until the dough has doubled in size. This method helps develop flavor and texture while giving the dough time to rise gradually.
- Transferring and Letting It Rise: Alternatively, you can transfer the mixed dough to a greased bowl, cover it with a damp cloth or plastic wrap, and let it rise for about an hour. This method provides a longer initial rise, resulting in a slightly different flavor profile.
Regardless of the method you choose, keep an eye on the dough and wait until it has doubled in size. This will ensure that you achieve the desired texture and flavor in your French bread.
Shaping the Loaves
Once the dough has risen, it’s time to shape it into those iconic French bread loaves. Shaping the loaves not only gives them their characteristic appearance but also helps with the final rise and crumb structure.
Here’s a step-by-step guide on how to shape French bread loaves:
- Divide the Dough: Start by dividing the risen dough into two equal portions. This will make two loaves of French bread.
- Fold and Roll: Take one portion of the dough and gently flatten it into a rectangle. Fold the dough lengthwise, seal the edges, and roll it up tightly from one end. Repeat the process for the second portion of dough.
- Pinch the Seams: Place the rolled dough seam-side down on a lightly floured surface. Gently pinch the seams at the bottom of the loaves to secure them.
With these steps, you’ll create beautifully shaped French bread loaves that are ready for the final rise and baking in the oven.
Rising Methods Comparison
| Method | Pros | Cons |
|---|---|---|
| Resting and Stirring Down | Gradual rise allows for better flavor development | Requires more time and attention |
| Transferring and Letting It Rise | Long initial rise enhances flavor | Requires longer waiting time |
Baking and Tips for a Perfect Crust
Once you have shaped your French bread loaves, it’s time to bake them to perfection. Follow these tips to achieve a crusty and golden exterior that will make your homemade French bread irresistible.
To start, it is essential to score the dough before baking. This involves making shallow cuts on the surface of the dough using a bread lame or a sharp knife. Scoring not only adds an attractive pattern to the bread but also allows the dough to rise evenly and prevents unsightly cracks.
Once scored, let the loaves rise until they have become puffy. This typically takes around 30-45 minutes, but the exact time may vary depending on the temperature and humidity in your kitchen. Keep a close eye on the dough to ensure it doesn’t overproof.
Before placing the loaves in the oven, here’s a little trick to achieve a crusty French bread: toss a handful of ice cubes onto the bottom of the preheated oven just before baking. As the ice cubes melt, they release steam, which creates a moist environment in the oven. This steam helps to develop a crispy crust on the bread.
To further enhance the crust, you can try adjusting the oven temperature and rack position. Increasing the oven temperature slightly can result in a deeper golden color. Placing the loaves on the top rack of the oven can also help to achieve a more crispy crust.
If you prefer a lighter loaf, you can experiment with using whole wheat flour. However, for a crusty French bread, it is recommended to use white whole wheat flour. This type of flour is milled from a different variety of wheat, which gives the bread a lighter texture while still maintaining the desired crustiness.
Remember, baking French bread is both an art and a science. Don’t be discouraged if your first few attempts are not perfect. With practice and these tips in mind, you’ll soon be baking French bread that rivals your favorite bakery.

Conclusion
Making homemade French bread can be a delightful and satisfying experience, even if you’re a beginner in the kitchen. With this easy French bread recipe, you’ll be able to bake a mouthwatering loaf that boasts a perfectly crusty exterior and a soft, chewy interior. By carefully following the step-by-step instructions and incorporating the helpful tips provided, you can recreate the taste and texture of a bakery-quality French bread in the comfort of your own home.
Whether you choose to serve your homemade French bread alongside a warm bowl of soup or simply enjoy it on its own, you can be confident that your guests, family, or even just yourself will be thoroughly impressed. The aroma of freshly baked bread wafting through your kitchen will entice everyone to the table, eager to savor every bite of this artisanal delight.
So, why wait? It’s time to roll up your sleeves, gather your ingredients, and embark on a culinary adventure that will yield a delectable homemade French bread. The satisfaction of creating something so wonderful with your own hands is unmatched, and the rewards, both in taste and in personal accomplishment, are well worth the effort. Get ready to enjoy the crusty exterior, the fluffy interior, and all the joys that homemade French bread brings.
FAQ
Can I make this easy French bread recipe if I am a beginner?
Absolutely! This recipe is perfect for beginners and provides step-by-step instructions for making delicious French bread.
Can I use whole wheat flour instead of all-purpose flour?
Yes, you can use whole wheat flour, but for a lighter loaf, it is recommended to use white whole wheat flour.
How do I know when the dough has risen enough?
The dough should double in size when it has risen enough. You can also do a poke test – if the indentation you make with your finger remains, the dough is ready.
Why is it important to score the dough before baking?
Scoring the dough helps with rising and prevents cracking. It also adds an aesthetic touch to the bread.
What can I do to achieve a deeper golden crust?
Increasing the oven temperature and adjusting the oven rack position can help achieve a deeper golden crust. Tossing ice cubes onto the bottom of the oven also adds crispness to the crust.
How long does the French bread need to cool before slicing?
It is best to let the French bread cool completely before slicing to ensure a nice texture.