Oreo layer cake showcases a delightful combination of a moist, flavorful cake with the classic taste of Oreo cookies. This sweet dessert is a dream for Oreo lovers, as well as anyone who enjoys a delectable and indulgent dessert. The rich flavors of the chocolate cake perfectly complement the Oreo-infused buttercream frosting, resulting in a dessert that is as visually appealing as it is scrumptious.
Baking an Oreo layer cake may initially seem daunting, but it’s actually quite manageable even for a novice baker. By carefully blending Oreo cookie crumbs into both the cake batter and frosting, you can create a dessert that features the taste and texture of your favorite cookie in every bite. Armed with a reliable recipe and a willingness to experiment, you’re well on your way to creating an irresistible treat the whole family will love.
As you embark on the journey of creating your own mouthwatering Oreo layer cake, remember that attention to detail and maintaining the right balance between cake and frosting is crucial. Gather all of the required ingredients, including the star of the show – Oreo cookies – and you’ll be on the path to baking success. With carefully measured ingredients and proper technique, you’re sure to impress with a deliciously satisfying and visually stunning Oreo layer cake.
Key Ingredients

Flour Selection
When it comes to making an Oreo layer cake, selecting the right flour is crucial. Typically, all-purpose flour is recommended for this recipe as it provides a good balance of protein and starch, resulting in a tender cake crumb. Make sure to measure your flour accurately for the best results.
Choosing the Right Oreos
The star ingredient of this cake is, of course, the Oreos. To infuse the cake with that delicious Oreo flavor, you’ll need Oreo crumbs. This can be achieved by using about 15 Oreos and crushing them into fine crumbs. Be sure to use the classic Oreos, as flavored or limited-edition Oreos may alter the taste of your cake.
Butter and Eggs
Butter plays a significant role in your Oreo layer cake by providing both flavor and structure. Make sure to use unsalted butter that has been softened to room temperature, as it will be easier to incorporate with the other ingredients. Eggs also contribute to the cake’s structure and should be at room temperature for even mixing.
Leavening Agents
In order to achieve a light and fluffy cake, proper leavening agents must be used. For an Oreo layer cake, baking powder acts as the primary leavening agent. Be sure that your baking powder is fresh for optimal results. Moreover, a small amount of salt is necessary to balance the sweetness of the sugar and Oreos, while enhancing the overall flavor.
Additionally, include granulated sugar and a dash of vanilla extract to sweeten and flavor the cake. Remember, following proper measurements and quality ingredients will result in a delicious and successful Oreo layer cake.
Baking the Cake
Mixing the Batter
To bake the perfect Oreo layer cake, start by combining your dry ingredients in a large mixing bowl. For a delicious chocolate cake, make sure to use Dutch-processed cocoa powder and baking soda for a balanced rise. In a separate bowl, whisk together the wet ingredients like vegetable oil, buttermilk, and espresso powder. Slowly incorporate the wet ingredients into the dry mixture, taking care not to overmix. Finally, fold in crushed Oreo pieces into the batter.
Cake Pans and Preparation
Prepare your cake pans by greasing them with butter or nonstick spray and lining the bottoms with parchment paper. Using three 8-inch round cake pans will yield the ideal thickness for each layer. A helpful tool to ensure evenly baked layers is using bake-even strips. Soak them in water following package instructions, then wrap them around the cake pans before filling with batter. This helps promote a more level rise and prevents doming.
Oven Settings and Baking
Preheat your oven to 350ºF (180°C) for optimal baking. Divide the prepared batter evenly among the three prepared cake pans. Gently tap the pans on the counter to release any air bubbles and ensure a smooth top. Place them on the middle rack of the oven and bake for approximately 25-30 minutes.
Testing for Doneness
To check if the cake layers are done, insert a toothpick or cake tester into the center of each cake. The toothpick should come out with just a few moist crumbs attached, indicating that the cake is baked through but still moist. Overbaking may result in a dry cake, so keep an eye on it as it nears the end of the suggested baking time. Once the cakes are done, let them cool in the pans for 10 minutes before transferring them to a wire rack to cool completely.
Assembling the Layers
Leveling the Cake Layers
Before you begin assembling your Oreo layer cake, it’s important to level the cake layers. To do this, you can use a cake leveler or a large serrated knife. Carefully trim the domed tops of each layer to create an even surface. This not only makes the cake look better, but it also helps the layers stack evenly and improves the overall structure.
Building the Cake Structure
To create the Oreo layer cake, prepare the Oreo buttercream by combining softened unsalted butter, powdered sugar, vanilla extract, and crushed Oreos. Once the frosting is well-mixed and creamy, you can begin to build up the layers of the cake.
- Place the first leveled cake layer onto your serving plate or cake stand.
- Spread a generous layer of Oreo buttercream over the top of the cake using an offset spatula.
- Add the second cake layer, carefully pressing down to ensure that it adheres to the frosting.
- Repeat the process by spreading another layer of Oreo buttercream, followed by the third and final cake layer.
- To finish, cover the entire cake with a thin layer of buttercream, sealing in any crumbs. This is known as a “crumb coat” and will serve as a foundation for the final layer of frosting.
Chill the cake for about 30 minutes before moving onto the next step. After the crumb coat has set, you can apply a thicker, more even layer of Oreo buttercream. This should completely cover the cake and create a smooth foundation for decorative techniques.
Decorative Techniques
Once you have covered the entire cake with a smooth layer of Oreo buttercream, it’s time to get creative and decorate your masterpiece. Here are some ideas to add a professional touch:
- Piping: Fill a piping bag with the Oreo buttercream, fitted with your desired piping tip. By using different pressure and angles, you can create various designs such as rosettes, swirls, or shells along the top and base of the cake.
- Ganache drip: If you’d like to incorporate a touch of chocolate, consider making a chocolate ganache drip. Using a spoon or a squeeze bottle, gently pour a small amount of ganache along the edge of the cake, allowing it to naturally cascade down the sides. Then, fill in the top with more ganache, spreading out any excess for a smooth finish.
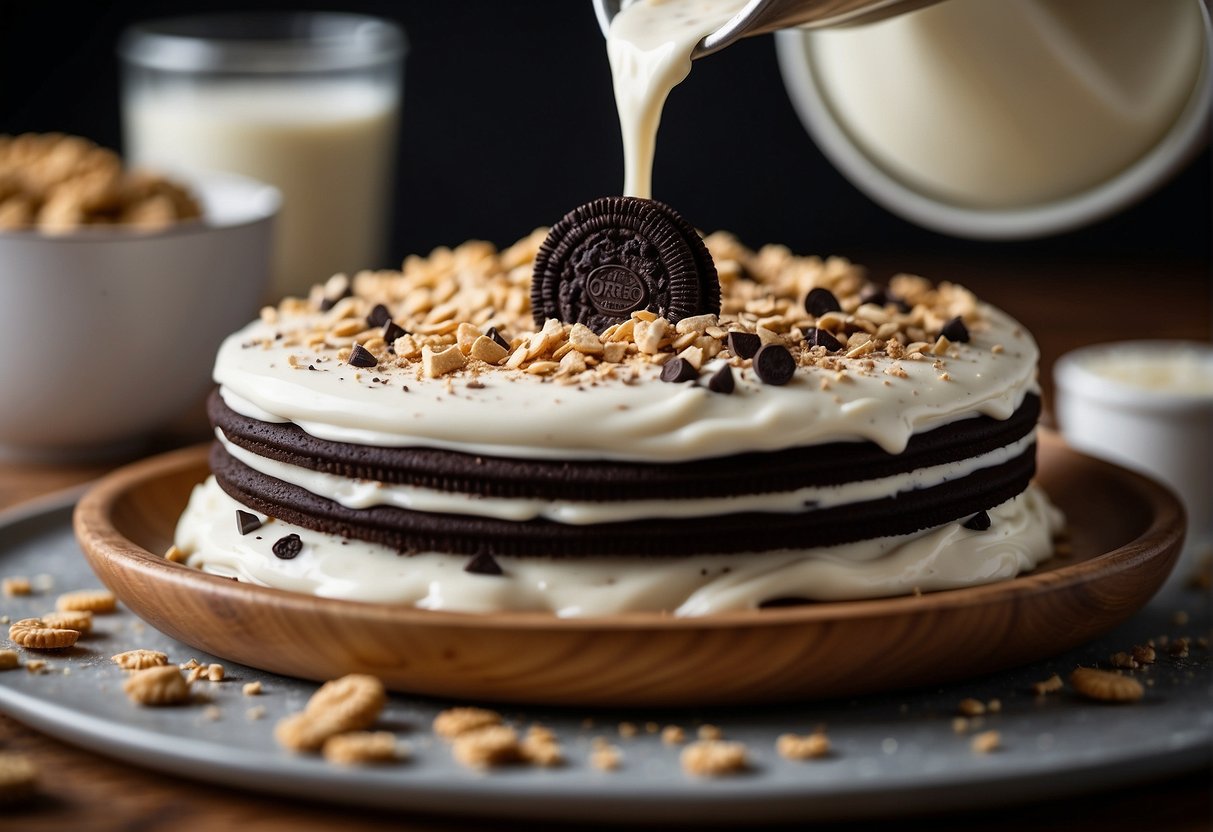
- Oreo decoration: Finish the cake by adding whole, crushed, or halved Oreos along the top or around the edges for a fun and tasty decoration.
Feel free to mix and match these techniques to create the perfect Oreo layer cake that suits your personal style. Remember, the most important part is that you enjoy the process and take pride in your delicious creation!
Creating the Perfect Frosting
When it comes to creating an Oreo layer cake, frosting plays a significant role in enhancing the overall taste and appearance of your dessert. In this section, we’ll cover two essential frostings that will take your Oreo layer cake to the next level: Oreo Buttercream Frosting and Ganache Drip.
Oreo Buttercream Frosting
An Oreo Buttercream frosting adds an irresistible layer of smoothness to complement the richness of the chocolate cake. To make this frosting, you’ll need the following ingredients:
- 1 cup unsalted butter, room temperature
- 4 cups powdered sugar
- 1/4 cup heavy cream or milk
- 2 teaspoons vanilla extract
- 12-15 Oreo cookies, crushed into fine crumbs
- Start by beating the softened butter in a large mixing bowl until it’s light and creamy.
- Gradually add the powdered sugar while continuing to beat the butter. Mix until fully combined.
- Slowly pour in the heavy cream or milk and the vanilla extract, and blend until the frosting becomes smooth and fluffy.
- Finally, fold in the crushed Oreo crumbs, making sure they are evenly distributed throughout the frosting.
Note: You can adjust the consistency of your Oreo buttercream frosting by adding more powdered sugar or milk, depending on your preference.
Ganache Drip
Adding a chocolate ganache drip to your Oreo layer cake amplifies its visual appeal and provides an extra boost of flavor. To create the perfect ganache drip, gather the following ingredients:
- 1 cup chocolate chips or chopped chocolate
- 1/2 cup heavy whipping cream
Here’s how to make the ganache:
- Place chocolate chips or chopped chocolate in a heat-proof bowl.
- Heat the heavy whipping cream in a saucepan until it begins to simmer, but avoid boiling.
- Pour the hot cream over the chocolate and let it sit for a minute. This will give the chocolate enough time to soften.
- Gently stir the mixture to form a smooth, glossy ganache.
Once the ganache has cooled to room temperature, you can start to apply it to your Oreo layer cake. Begin by pouring a small amount onto the top of the cake and use a spatula to spread it around the edges, allowing it to drip down the sides.
Serving and Storage
Serving the Oreo Layer Cake: For an enjoyable and memorable dessert experience, present your Oreo Layer Cake elegantly at parties, gatherings, or even just a simple family dinner. As this cake is an absolute delight for sweet lovers, don’t be surprised when it becomes a hit at your event.
To serve the cake perfectly, consider the following tips:
- Let the cake rest for a short while after frosting, allowing the layers to set
- Use a long and sharp serrated knife to cut even and clean slices
- Clean the knife between slices, ensuring neat servings and showcasing the beautiful layers of the cake
Storage of the Oreo Layer Cake: As a cake perfectionist, proper storage is essential to maintain the cake’s texture and taste. Follow these storage guidelines for the best results:
- Room temperature storage: If the ambient temperature is cool (below 72°F/22°C), store the cake in a cake container or a cake stand with a cover, for up to 2 days.
- Refrigerated storage: For warmer environments, or if you’d like to store the cake a little longer, keep it in an airtight container in the refrigerator. The cake stays fresh for around 4-5 days. However, allow it to come back to room temperature before serving to maintain its flavor and texture.
By serving and storing your Oreo Layer Cake with care, you’ll guarantee an indulgent, delicious experience for your friends, family, and fellow party-goers. Enjoy your beautifully layered, sweet masterpiece!