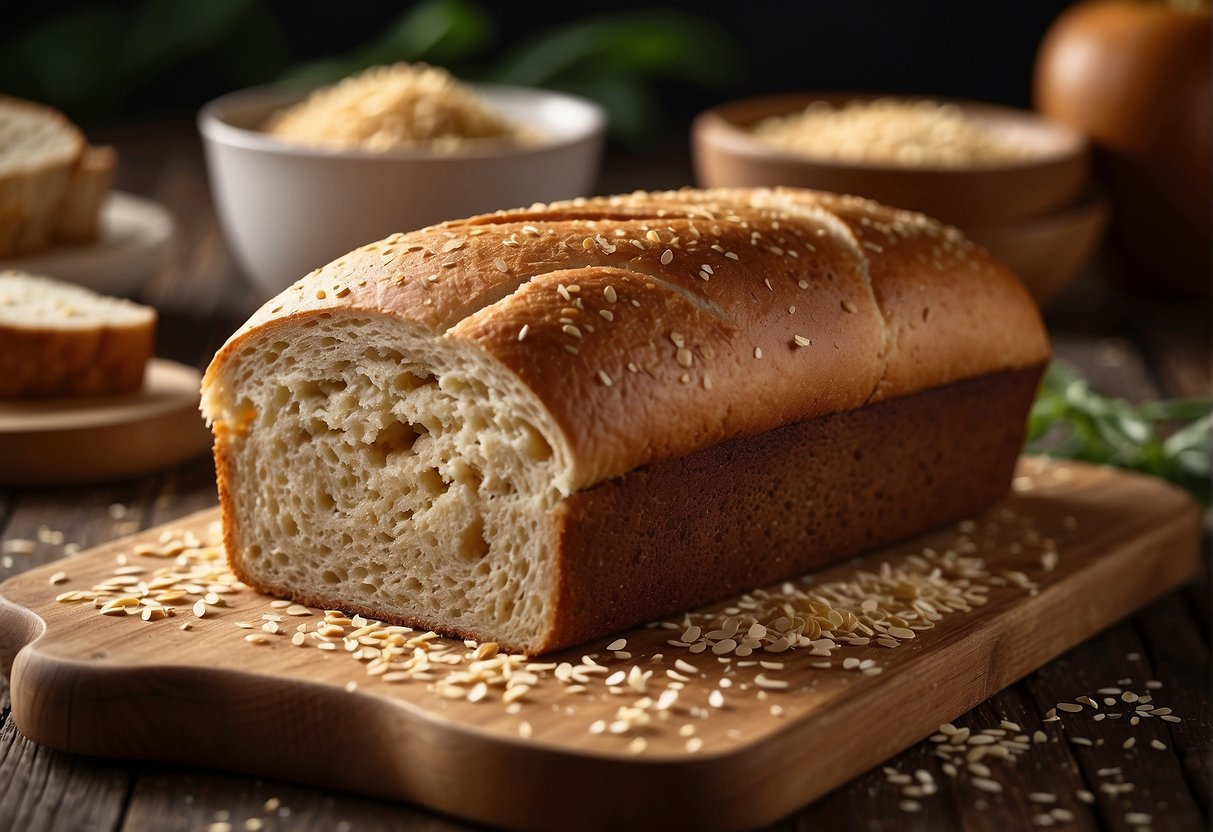
Gluten-free sandwich bread is becoming increasingly popular among people who follow a gluten-free diet or desire a healthier alternative to regular bread. This bread is made without gluten, a protein found in wheat, barley, and rye, which can cause digestive issues for those with celiac disease or gluten sensitivity. As a result, gluten-free sandwich bread offers a delicious and nutritious option for enjoying your favorite sandwiches.
There are numerous recipes and techniques available to help you make your own gluten-free sandwich bread at home. Some recipes incorporate ingredients like millet flour, tapioca starch, and xanthan gum to achieve a soft and tender texture. Additionally, a variety of gluten-free bread products can be found at your local grocery store or online, ranging from white to whole grain loaves. With plenty of choices at your disposal, you’ll find the perfect gluten-free sandwich bread to satisfy your cravings and dietary needs.
Understanding Gluten-Free Bread
The Role of Gluten in Bread
Gluten is a type of protein found in grains like wheat, rye, and barley. In traditional bread making, gluten plays a crucial role in giving the dough its structure and elasticity. When you knead the dough, gluten strands stretch and form a network that traps air bubbles, resulting in a soft, fluffy, and chewy texture.
However, with gluten-free bread, you need to use a blend of flours and starches to achieve a similar texture. Some popular gluten-free flour alternatives include brown rice flour, millet flour, and tapioca starch. Although these ingredients don’t possess the same properties as gluten, they can still produce a satisfying loaf of bread with proper techniques and recipe adjustments.
Benefits of a Gluten-Free Diet
Switching to a gluten-free diet has multiple benefits, especially for individuals with celiac disease, non-celiac gluten sensitivity, or wheat allergies. Some advantages include:
- Improved gut health: A gluten-free diet can reduce inflammation in the intestine, which is particularly beneficial for celiac disease sufferers. This helps in better nutrient absorption and overall digestive health.
- Reduced symptoms: By eliminating gluten, those with gluten intolerance or sensitivities can experience a decrease in symptoms such as bloating, gas, and digestive discomfort.
- Increased energy levels: Some people report feeling more energetic and focused when eliminating gluten from their diet.
By choosing a gluten-free sandwich bread, you are catering to the dietary needs of a broader audience while ensuring that everyone can enjoy a delicious and satisfying meal. With the right recipe and ingredients, gluten-free sandwich bread can rival the taste and texture of traditional wheat bread.
Key Ingredients for Gluten-Free Sandwich Bread
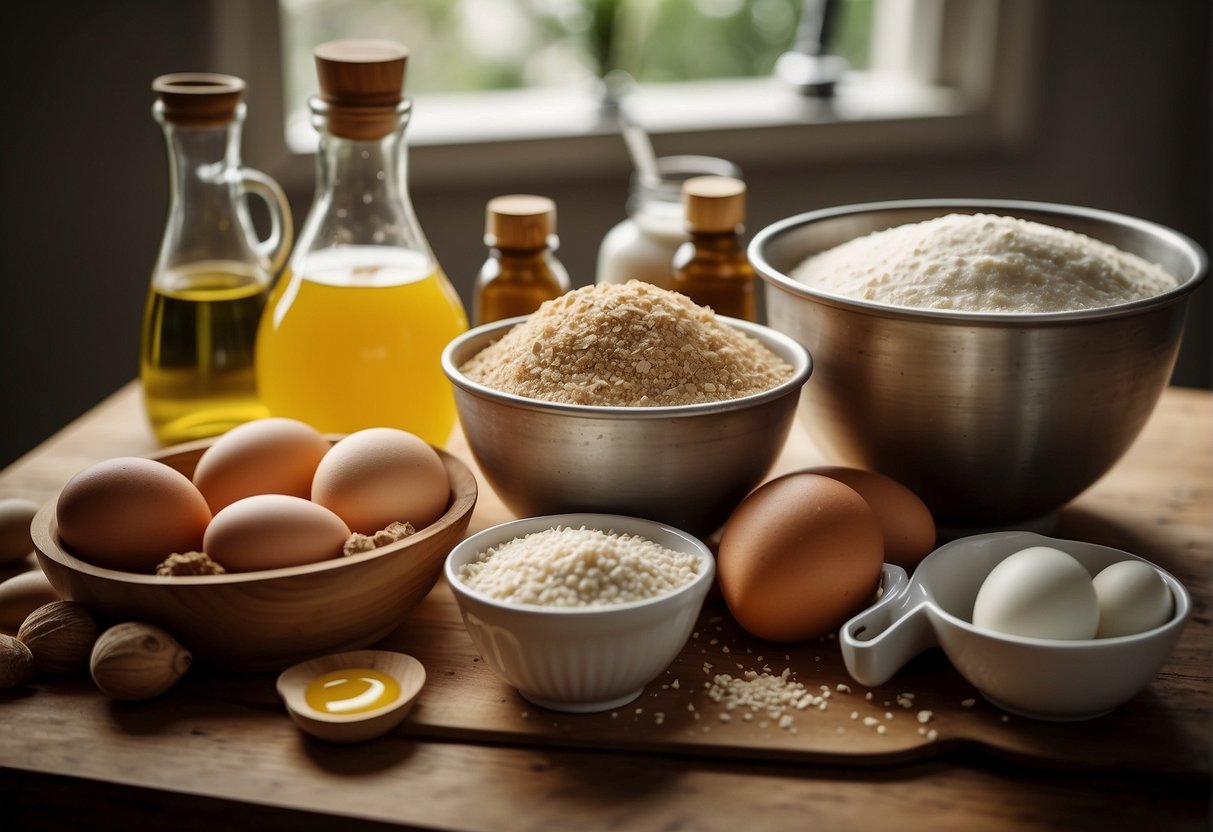
Choosing the Right Flour Blend
When making gluten-free sandwich bread, the choice of flour blend is critical to achieving the desired taste and texture. Unlike wheat-based bread, gluten-free bread requires a combination of flours and starches. Some commonly used gluten-free flours include rice flour, sorghum flour, and millet flour. In addition to these, starches such as tapioca starch and potato starch help to improve the texture and hold the bread together.
A basic gluten-free flour blend may include:
- 2 cups rice flour
- 2/3 cups potato starch
- 1/3 cups tapioca starch
Feel free to experiment with different proportions and types of flours to find the perfect blend for your desired bread texture. Keep in mind that the flour blend’s properties will affect the bread’s rise, flavor, and structure.
Binders and Leavening Agents
When making gluten-free bread, binders and leavening agents are integral in achieving an excellent texture and structure. These ingredients help to replicate the elasticity and rising capabilities found in wheat-based bread.
- Xanthan gum: This is a common ingredient in gluten-free baking as it serves as a binder and provides elasticity to the dough. Aim for approximately 1 teaspoon of xanthan gum for every cup of flour in your recipe.
- Eggs: Eggs contribute to the bread’s structure, providing moisture and proteins that help bind the ingredients together. If you need an egg substitute, consider using flaxseed, chia seeds, or a commercial egg replacer.
- Milk: Milk adds moisture and contributes to a tender crumb. You can use dairy milk or opt for a dairy-free alternative such as almond milk, oat milk, or soy milk.
- Yeast: Yeast is a crucial leavening agent in bread recipes, helping the dough rise and develop air pockets. Be sure to use a gluten-free yeast and follow the recipe’s instructions regarding temperature and proofing times for optimal results.
With the right combination of gluten-free flours and proper binders and leavening agents, you’ll be able to create a delicious, high-quality sandwich bread. Experiment with various recipes, and don’t be afraid to adjust ingredients to suit your taste and texture preferences.
Preparing the Dough and Baking Process
Mixing and Kneading Tips
When preparing gluten-free sandwich bread, first gather your ingredients – flour, sugar, yeast, salt, and xanthan gum. Ensure you’re using a gluten-free flour blend specifically designed for baking. In a large bowl or the bowl of your stand mixer, combine these dry ingredients and mix until well-incorporated.
Remember to measure your flour accurately, either by weighing or gently spooning it into a measuring cup and leveling off the excess. For the liquid component, use water or milk heated to around 110°F. A milk substitute can result in a creamier loaf with a slightly darker crust.
Gently add the liquid to the dry ingredients and knead the dough. You may notice that gluten-free dough has a different consistency compared to traditional dough. It’s generally stickier and more delicate, as it lacks the elasticity of gluten. Don’t over-knead, as this can cause your bread to become dense. Just knead until the dough comes together and feels smooth.
Allow the dough to rise in a warm, draft-free spot. Gluten-free dough typically takes longer to rise than traditional dough, usually around 1 to 2 hours. Keep an eye on it and ensure it has doubled in size before proceeding.
Baking Techniques for the Perfect Crust
Before you begin baking, preheat your oven according to the recipe’s instructions. This is essential for achieving an even bake and helping the bread to rise properly.
Prepare your loaf pan by greasing it well or lining it with parchment paper, which will prevent your bread from sticking. Transfer the risen dough into the loaf pan, being mindful of its delicate nature.
Bake for the recommended time in your recipe, usually between 45 minutes and 1 hour. Many gluten-free bread recipes benefit from a slightly lower temperature and a longer bake time to ensure even cooking through the center of the loaf.
To check the bread’s doneness, you can insert a skewer or a thermometer into the center. The skewer should come out clean, and the thermometer should register a temperature of around 200 – 210°F.
Once you’ve determined that your bread is done, remove it from the oven and let it cool in the loaf pan for about 10-15 minutes. Then, transfer it to a wire rack to cool completely. Resist the temptation of slicing into your loaf immediately, as gluten-free bread needs time to set and develop its structure. Rest the bread for at least an hour or two before slicing and enjoying your delicious homemade gluten-free sandwich bread.
Post-Baking Tips for Quality and Preservation
Cooling and Slicing
After baking your gluten-free sandwich bread, it’s important to let it cool properly to achieve the best texture and flavor. Place your bread on a cooling rack and allow it to cool completely to room temperature to prevent the bread from becoming gummy. This process will also enable you to slice the bread more easily.
When slicing your bread, use a serrated knife, and ensure that your slices are even and consistent. To further improve the bread’s texture and crust, you can lightly toast the slices before making your sandwiches.
Storing Homemade Gluten-Free Bread
Proper storage is essential for maintaining the quality and freshness of your homemade gluten-free bread. Once your bread has completely cooled, place it in an airtight container to prevent it from drying out or absorbing external odors. Storing it this way will keep your bread fresh for up to 3-5 days at room temperature.
However, if you want to extend the bread’s shelf life beyond a few days, consider freezing it. To do this, wrap the bread or individual slices in plastic wrap or aluminum foil before placing them in a resealable freezer bag. Label the bag with the date so you can keep track of its freshness. When you want to enjoy your bread again, simply thaw it at room temperature or reheat it in a toaster or oven. The bread can be stored in the freezer for up to 3 months while maintaining its quality.
Remember to always check your bread’s internal temperature for doneness when baking; it should reach about 200-210°F (93-99°C) for optimal results. By following these post-baking tips, you’ll be able to enjoy your homemade gluten-free bread with confidence, knowing it’s at its best quality and preserved for your enjoyment.
Creative Recipes and Serving Suggestions
Delicious Gluten-Free Sandwich Ideas
Whether you’re a sandwich enthusiast or simply need a quick meal, gluten-free sandwich bread can open up a world of options. By using a high-quality gluten-free sandwich bread recipe, you can create scrumptious sandwiches without compromising on taste and texture.
- Classic BLT: Pair your gluten-free bread with crispy bacon, lettuce, and juicy tomatoes for a mouthwatering twist on this popular sandwich.
- Ham and Cheese Melt: Layer sliced ham, your favorite cheese, and a thin layer of mustard or mayo. Toast the sandwich until the cheese is melted and the bread is golden brown.
- Grilled Veggie Delight: Grill or roast vegetables such as zucchini, bell peppers, and red onion. Add them to your gluten-free bread with a spread of hummus or pesto for a healthy and satisfying meal.
- Chicken Salad Sandwich: Combine cooked, shredded chicken with diced celery, onion, and mayonnaise. Season to taste, then add a generous scoop to your bread and enjoy.
Don’t be afraid to get creative with your sandwich fillings, as the right gluten-free sandwich bread recipe can handle just about anything.
Making French Toast with Gluten-Free Bread
After mastering the perfect gluten-free sandwich bread, you might be craving more ways to use it. The good news is that your gluten-free bread also works wonderfully for making delicious French toast. Follow these simple steps:
- Whisk together eggs, milk, vanilla extract, and a pinch of cinnamon in a shallow dish.
- Heat butter in a non-stick skillet over medium heat.
- Soak your gluten-free bread slices in the egg mixture, allowing each side to absorb the liquid.
- Carefully transfer the soaked bread to the skillet, and cook until golden and slightly crisp on each side.
Serve your gluten-free French toast with a dusting of powdered sugar, a drizzle of maple syrup, or a spoonful of your favorite fruit compote for a delectable breakfast treat. Enjoying tasty and creative recipes has never been easier, thanks to versatile gluten-free sandwich bread.