Creating flowers from fondant is a popular technique to elevate the appearance of your cakes and desserts. These edible decorations add an artistic touch that can impress your guests at celebrations, weddings, and other special occasions. With a variety of flower designs to choose from, mastering the art of crafting fondant flowers has never been more enjoyable.
To make fondant flowers, you will need a few simple tools such as a rolling pin, flower-shaped cutters, and a workspace to shape your designs. First, choose the color of fondant that you would like to work with. Roll the fondant into a flat sheet, ensuring it is about 1⁄8 inch (0.32 cm) thick, and then use the flower cutters to create the desired shapes.
As you become familiar with the process, you can experiment with different techniques to create more intricate designs, such as daisies, orchids, roses, or even succulents. Whether you are an experienced baker or a beginner, learning how to make fondant flowers is a creative and rewarding skill that can elevate your baking to new heights.
Getting Started with Fondant Flowers

Choosing the Right Fondant
When starting with fondant flowers, it’s important to choose the right type of fondant. There are different varieties available, but we recommend using a pliable, sugar-based fondant that is easy to mold and shape. This will make your flowers more lifelike and easier to work with. Make sure the fondant is fresh and hasn’t dried out, as this will affect the final outcome of your flowers.
Essential Tools for Shaping Flowers
To make stunning fondant flowers, you’ll need a few essential tools. Here’s a list of the key items you should have on hand:
- Fondant: A sugar-based, pliable fondant ideal for molding and shaping.
- Cornstarch or powdered sugar: Use this to prevent the fondant from sticking to your work surface and tools.
- Rolling pin: A small rolling pin to roll out the fondant to the desired thickness.
- Fondant cutters: These come in various shapes and sizes to help create flower petals and leaves.
- Ball tool or fondant smoother: This tool helps you soften and shape the edges of your petals, giving them a more natural look.
- Small offset spatula: Useful for smoothing and lifting edges.
- Cutting board with a layer of cling wrap: This will provide a clean work surface for shaping your fondant flowers.
Once you have gathered these tools and chosen the right fondant, you’re ready to begin creating beautiful, eye-catching fondant flowers for your cakes and cupcakes. With practice and patience, you’ll be able to create a stunning garden of edible delights.
Basic Techniques for Creating Fondant Flowers
In this section, we will learn about the basic techniques to create stunning fondant flowers. The process involves three main steps: rolling and thinning petals, forming the base of the flower, and shaping petals and adding detail. Following these steps will provide a solid foundation for creating various types of fondant flowers.
Rolling and Thinning Petals
To create delicate petals, you’ll first need to roll out the fondant to an appropriate thickness. Use a rolling pin to evenly flatten the fondant to approximately 1/8-inch (0.32 cm) in thickness. Once the fondant is flattened, use a fondant cutter to cut out desired petal shapes.
To thin the edges of petals and achieve a more realistic appearance, you can utilize a ball tool. Ideally, working on a flat surface covered with a non-stick mat, gently glide the ball tool along the edges of each petal applying slight pressure. This technique will give petals a more delicate and lifelike appearance.
Forming the Base of the Flower
The next step is to create a base for your flower. The base will hold the petals together as the flower takes shape. To form the base, simply take a small piece of fondant, and roll it into a small ball or cone shape. This will depend on the type of flower you’re creating. Having a firm base is critical, as it supports the structure of the flower.
Shaping Petals and Adding Detail
After thinning the petals and forming your base, it’s time to assemble the flower. Begin by attaching petals to the base one at a time while making sure to overlap them slightly as you go around.
To add more realistic details to your flower, consider these suggestions:
- Use the ball tool or a veining tool to create lines or veins in each petal.
- Gently curl the petal edges outward or inward to add dimension and depth.
- Layer multiple petals of different sizes to achieve a fuller look.
- Use a dusting of edible petal dust to mimic natural variations in color.
Experiment with these basic techniques and instructions to create an array of stunning fondant flowers. As you gain more confidence and experience, you’ll discover new ways to enhance your fondant flower creations, adding a touch of elegance to cakes and other confectionery delights.
Advanced Decorative Elements
Coloring Your Fondant Flowers
To create stunning and realistic fondant flowers, adding color is key. You can color your fondant by using food coloring, which is available in various forms such as gel, powder, or liquid. When using food coloring, be careful to add only a small amount at a time and knead the fondant until the color is distributed evenly. For more natural-looking flowers, you can try mixing different shades or layering multiple colors to achieve the desired effect.
- Gel coloring: Provides intense colors, ideal for creating deep shades.
- Powder coloring: Perfect for creating subtle tones and hues.
- Liquid coloring: Easy to mix into the fondant but may result in lighter colors.
Adding Textures and Ruffles
Experimenting with textures and ruffles add dimension and nuance to your fondant flowers. For instance, to create ruffles, roll your fondant thinly and use a ball tool or your fingers to gently create a wavy edge before attaching it to the flower base. A popular method for creating textured fondant flowers is the ribbon rose technique. This involves rolling a strip of fondant, folding it in half lengthwise, and then gently twisting and rolling it to create a rose-like shape.
- Roll the fondant thinly.
- Create a wavy edge using a ball tool or your fingers.
- Attach the ruffled fondant to the flower base.
- For ribbon roses, fold a strip of fondant in half lengthwise and twist.
Creating Lifelike Flowers
Crafting lifelike fondant flowers requires attention to detail and a little patience. One way to achieve realistic flowers is by using fondant cutters or molds designed for specific flower types, such as daisies, orchids, or roses. To create more natural-looking leaves and petals, you can use veining tools or textured mats. Finally, don’t hesitate to look up reference images of real flowers to ensure your fondant creations capture their essence and beauty.
- Fondant cutters and molds: Helps to create accurate shapes for specific flower types.
- Veining tools and textured mats: Adds realistic details to leaves and petals.
- Reference images: Ensures that your fondant flowers closely resemble their natural counterparts.
Assembling and Storing Flowers
Assembling Multi-Layered Flowers
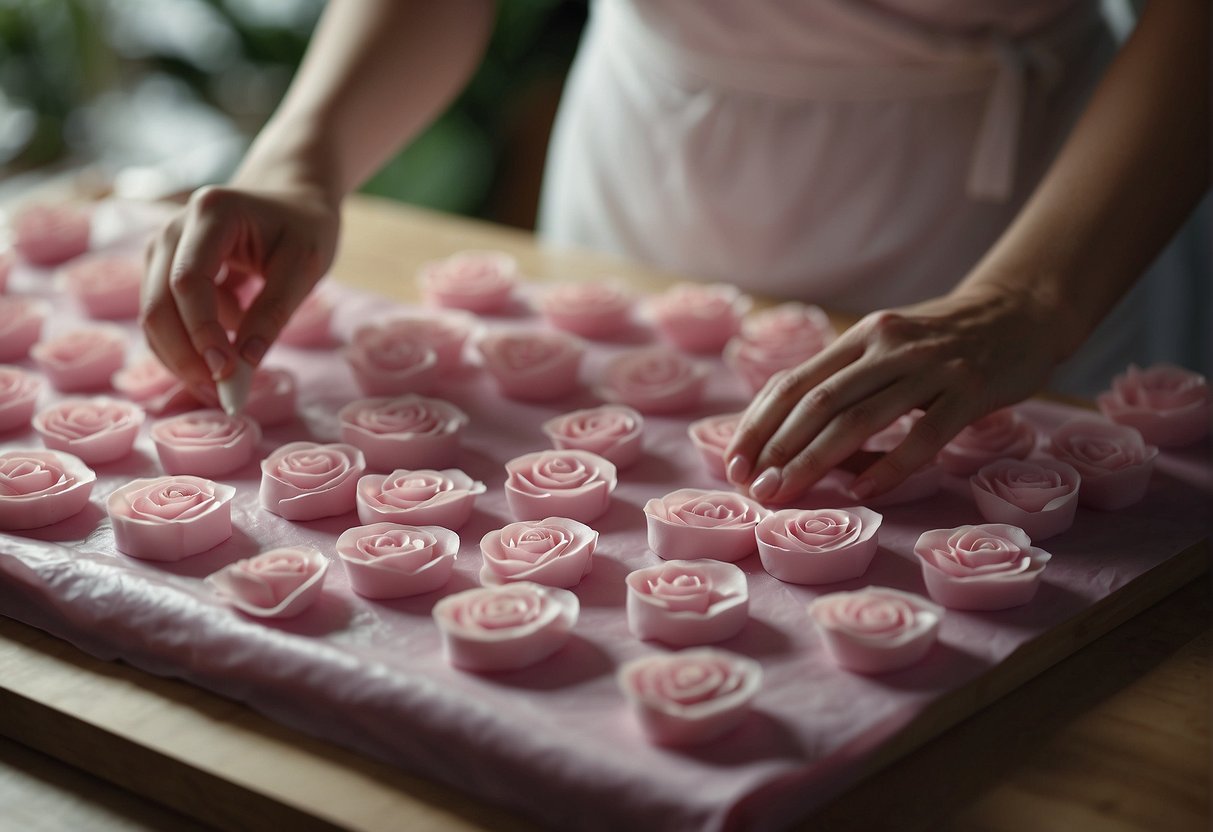
To create multi-layered fondant flowers, start by rolling out your fondant to a thickness of 1/8 inch (0.32 cm) and use flower-shaped cutters to cut out several layers of petals. You can use different sizes of cutters to achieve a more realistic and dynamic appearance.
- Prepare the petals: Gently press the petals between your fingers or use a fondant tool to give them a more natural appearance. You may also want to add some texture with a toothpick or a veining tool.
- Form the flower: Place the largest layer of petals in a forming cup to help maintain the flower’s shape as you assemble it. Apply a small amount of water or edible glue on the center of the first layer and then add the next layer of petals, offsetting them slightly from the layer beneath. Repeat this process until all the layers are attached.
- Allow to dry: Leave your assembled fondant flowers in the forming cups and allow them to air dry. It’s essential to ensure they are completely dry before storing them to prevent damage or molding.
Preserving Fondant Flowers Before Use
Once your multi-layered fondant flowers are dry, follow these storage tips to ensure they remain in pristine condition until you’re ready to use them:
- Use airtight containers: Store your fondant flowers in airtight plastic containers with sealing lids to keep out moisture and protect them from damage.
- Add cushioning: Line the bottom of the container with tissue paper, foam, or even plastic wrap to provide cushioning and support for the delicate flowers.
- Avoid freezing: Do not freeze your fondant flowers as this can cause them to become sticky and lose their shape when they thaw. Instead, keep them in a cool, dry place away from direct sunlight.
By following these steps, your fondant flowers will remain vibrant and intact until it’s time to add them to your cake masterpiece.
Incorporating Fondant Flowers on Cakes
Placement and Composition
When decorating your cake with fondant flowers, it’s essential to consider their placement and composition. Here are a few tips to ensure your fondant flowers look stunning on your cake:
- Balance and symmetry: Distribute the flowers evenly around your cake to achieve a visually appealing look. You can create a symmetrical design or opt for a more organic, asymmetrical style.
- Size and color variety: Combine different sizes and colors of flowers to add interest and depth to your cake design. You can mix large fondant roses with smaller flowers, alternating their colors for contrast.
- Cake board decoration: Extend the beauty of your flowers to your cake board by adding a few matching fondant decorations around the base. This will enhance the overall presentation and tie your design together.
Themed Decorations for Events
Fondant flowers are an excellent choice for a variety of events like weddings, birthdays, and other special occasions. Let’s explore some ideas for incorporating them into themed decorations:
- Wedding cakes: Fondant flowers are a beautiful and popular choice for wedding cakes. They can be used to create elegant, romantic or modern designs. Your flowers can be tailored to match your wedding colors, and you can explore various floral arrangements to achieve the perfect look.
- Birthday cakes: Using fondant flowers in birthday cake decorations adds a touch of sophistication and charm. You can customize your cake design by choosing flowers that suit the birthday person’s style, favorite colors, or even their birth flower.
- Special occasion cakes: Fondant flowers work well for any special event, from baby showers to anniversaries. Use them to create an eye-catching centerpiece or display your flowers alongside edible lettering to personalize your cake.
By following these guidelines, you’ll be able to create beautiful fondant flower arrangements and enhance the overall appearance of any cake. Remember to always trust your creativity and intuition when decorating, and have fun while you’re at it!
Troubleshooting Common Issues
Preventing Cracking and Melting
When working with fondant, it’s common to encounter issues like cracking and melting. To prevent these problems, follow these simple tips:
- Add shortening: If your fondant appears dry and begins to crack, knead in a small amount of vegetable shortening to reintroduce moisture and elasticity. Use it sparingly, as too much shortening can cause the fondant to become too soft.
- Roll the fondant evenly: When rolling out your fondant, ensure that it’s an even thickness to prevent uneven drying or cracking. Aim for a thickness of about 1⁄8 inch (0.32 cm).
- Work at room temperature: Always work in a room-temperature environment to avoid the fondant from becoming too soft due to heat. Keep your workspace and materials cool, but not cold, to maintain the desired working consistency.
- Avoid direct sunlight: Direct sunlight and other heat sources can cause your fondant flowers to melt or lose their shape. Create your flowers in a shaded area, and store them in a cool, dark place until you’re ready to use them.
Dealing with Humidity and Temperatures
In humid environments, fondant can become sticky and difficult to work with. Consider these suggestions to manage humidity and temperature issues:
- Use a dehumidifier: If you’re working in a humid room, a dehumidifier can help reduce moisture in the air and make it easier to handle the fondant.
- Store fondant properly: Keep unused fondant wrapped tightly in plastic wrap, and store it in a cool, dry place to prevent it from absorbing excess moisture.
- Dust your work surface: Before rolling out your fondant, lightly dust your work surface and rolling pin with powdered sugar or cornstarch to prevent sticking. Be mindful not to use too much as this can cause the fondant to dry out and crack.
- Limit exposure to air: Work with small portions of fondant at a time, and keep the rest covered when not in use. This will prevent the fondant from drying out and becoming susceptible to cracking.
- Adjust your recipe: If your fondant feels too soft and sweet, consider adding a small amount of tylose powder or gum tragacanth to help it harden and maintain its shape in humid conditions.
By following these tips and troubleshooting strategies, you can confidently create beautiful fondant flowers while managing common issues related to cracking, melting, and humidity.